
Physics diagrams for worksheets and presentations
Optics, mechanics, electricity and apparatus - the four corners of a physics worksheet, and the four places an hour disappears if every figure is drawn from scratch. Here is the shorter route, and what to watch for so the figures come out right on paper.
Ray diagrams: the figures that take the longest
A convex-lens ray diagram is three lines and an arrow once you know where they go - and twenty minutes of nudging in Word when you do not. The library already has the lens, the object, the image and the principal rays drawn, so the work becomes choosing the case you want to teach and labelling it.
Because the drawing inserts as shapes, you can lift the parallel ray out for a moment, ask the class where it goes, and put it back - or copy the same diagram and move the object inside the focal length, which gives you the second case for the next question without drawing anything.

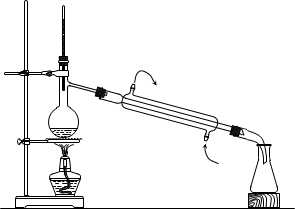

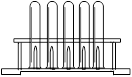
The four things physics teachers draw every week
Optics
Lenses and mirrors, the principal rays, refraction at a boundary, the eye, and simple instruments. Ray diagrams gain the most from vector inserts: the lines stay crisp at any size, which matters when the same figure goes from a worksheet to a projector.
Mechanics
Levers, pulleys, inclined planes, springs and free-body diagrams - force arrows drawn to length and labelled. Copy one and change the angle rather than drawing a new one.
Electricity
Cells, lamps, meters, resistor networks and their symbols. If you also teach electronics, the component library is the same one - see the circuit diagram guide.
Apparatus and experiments
Thermometers, calorimeters, the apparatus of every practical in the syllabus - the figures that are hardest to draw and least interesting to draw.
Making them readable on paper
- Insert at the default size, then resize the whole group if you need it smaller - not the individual lines, which is how labels end up the wrong size.
- Keep the line weight consistent across a worksheet. If one figure looks heavier than the rest, set the same weight on all of them.
- Do not rely on colour alone: a ray labelled "red" is a grey line on a school photocopier. Label it too.
- Check the print preview before running off a class set, and check the first copy after that.
- Use the calculators when a question needs a value: the working appears on the page with the numbers in it, which is what a mark scheme asks to see.
Every drawing carries alt text, so a figure you insert is announced to a screen reader and can be checked by accessibility tools - useful when materials have to be published online.
A worksheet's worth of diagrams, before the bell
7 days with the whole library, no card, and the same US$39.99 licence afterwards.